Windows的XAML UI框架提供了很多控件,支持用户界面开发库。其中一些有可视化,一些布局。 一些控件例子:https://github.com/Microsoft/Windows-universal-samples/tree/master/Samples/XamlUIBasics
我现在学了一下,给微软做一个中文版的,基本代码都是从微软那里复制,除了注释。
我们先学微软做一个简单的 frame ,新建 Page , 里面放title和跳转页
    public class page
    {
        public page()
        {

        }

        /// <summary>
        /// 跳转页
        /// </summary>
        public Type navigate
        {
            set
            {
                _navigate = value;
            }
            get
            {
                return _navigate;
            }
        }

        /// <summary>
        /// 页面名
        /// </summary>
        public string title
        {
            set
            {
                _title = value;
            }
            get
            {
                return _title;
            }
        }

        private Type _navigate;
        private string _title;
    }
我们需要把所有页放到一个类,本来这个类可以不弄,直接放 Page 使用索引,但是最后我还是想给宝资通打广告,于是弄了一个类,本来应该叫 page 管理器,我叫 baozitong ,他只有输入 title 返回 type ,因为导航只能使用 type 不能给对象
       public static Type page(string title)
       {
           foreach (var temp in _page)
           {
               if (temp.title == title)
               {
                   return temp.navigate;
               }
           }
           return null;
       }
       public static List<page> _page
       {
           set;
           get;
       }=new List<page>()
       {
           new page()
           {
               title = "appbar",
               navigate = typeof(appbar)
           }
       };
每次添加page可以在baozitong._page 写添加的页面
接着请看界面 splitview
<ToggleButton Grid.Row="0" IsChecked="{Binding ElementName=split,Path=IsPaneOpen,Mode=TwoWay}" FontFamily="Segoe MDL2 Assets" Content=""></ToggleButton>
<SplitView x:Name="split" Grid.Row="1" IsPaneOpen="True">
<SplitView.Pane>
<ListView ItemsSource="{x:Bind _page}" SelectionChanged="nagivate">
<ListView.ItemTemplate>
<DataTemplate>
<TextBlock Text="{Binding title}"></TextBlock>
</DataTemplate>
</ListView.ItemTemplate>
</ListView>
</SplitView.Pane>
<Frame x:Name="frame" ></Frame>
</SplitView>
        private void nagivate(object sender, SelectionChangedEventArgs e)
        {
            //跳转navigate
            frame.Navigate(((sender as ListView).SelectedItem as page).navigate);
        }
Appbars and commands
App bar
用于显示应用程序特定命令的工具栏。
App bar button
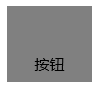
使用app bar风格按钮,下面来写一个简单的按钮
<AppBarButton Label="按钮" HorizontalContentAlignment="Center"/>
我们可以加上内容,这里不可以添加 Content 但是可以添加图标
            <AppBarButton Label="按钮" HorizontalContentAlignment="Center">
                <Grid Width="48" Height="48" Margin="0,-8,0,-4">
                    <SymbolIcon Symbol="Memo"/>
                    <TextBlock Text="内容" Margin="0,2,0,0" Style="{StaticResource CaptionTextBlockStyle}" HorizontalAlignment="Center"/>
                </Grid>
            </AppBarButton>

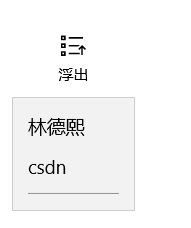
我们可以在按钮加浮出,请看代码
            <AppBarButton Icon="OpenWith" Label="浮出">
                <AppBarButton.Flyout>
                    <MenuFlyout>
                        <MenuFlyoutItem Text="林德熙"/>
                        <MenuFlyoutItem Text="csdn"/>
                        <MenuFlyoutSeparator></MenuFlyoutSeparator>
                    </MenuFlyout>
                </AppBarButton.Flyout>
            </AppBarButton>

App bar separator
命令栏中的命令组。
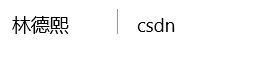
如果我们有很多按钮,我们可以使用下面的代码把按钮分开
            <AppBarButton Content="林德熙"></AppBarButton>
            <AppBarSeparator></AppBarSeparator>
            <AppBarButton Content="csdn"></AppBarButton>
App bar toggle button
开关命名命令栏
Command bar
一种专门处理命令按钮栏按钮
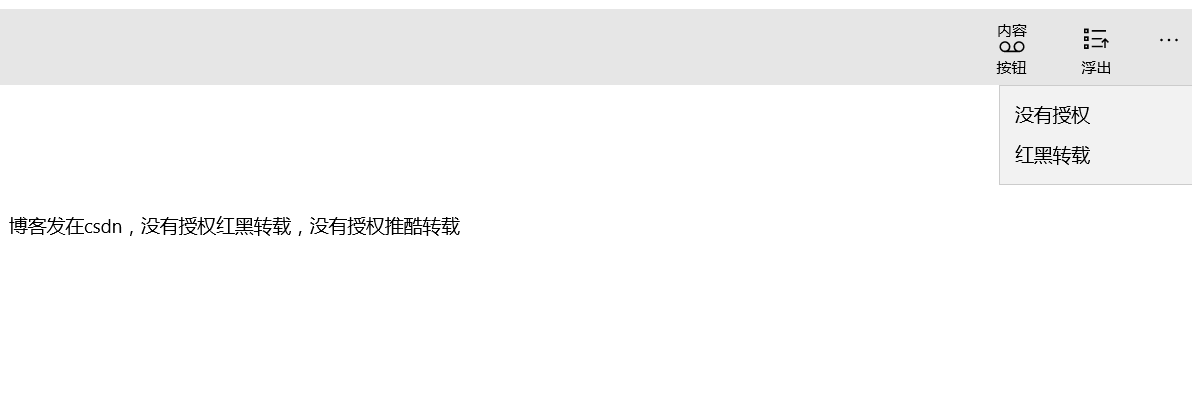
我们把刚才的按钮放在<CommandBar>
        <CommandBar>
            <AppBarButton Label="按钮" HorizontalContentAlignment="Center">
                <Grid Width="48" Height="48" Margin="0,-8,0,-4">
                    <SymbolIcon Symbol="Memo"/>
                    <TextBlock Text="内容" Margin="0,2,0,0" Style="{StaticResource CaptionTextBlockStyle}" HorizontalAlignment="Center"/>
                </Grid>
            </AppBarButton>

            <AppBarButton Icon="OpenWith" Label="浮出">
                <AppBarButton.Flyout>
                    <MenuFlyout>
                        <MenuFlyoutItem Text="林德熙"/>
                        <MenuFlyoutItem Text="csdn"/><!--博客没有授权红黑转载-->
                        <MenuFlyoutSeparator></MenuFlyoutSeparator>
                    </MenuFlyout>
                </AppBarButton.Flyout>
            </AppBarButton>
        </CommandBar>

我们也看到最后的按钮,那些用户不是很容易就需要使用的,但是还是有用的按钮就可以放在这里,请看下面
            <CommandBar.SecondaryCommands>
                <AppBarButton Label="没有授权"/>
                <AppBarButton Label="红黑转载"/>
            </CommandBar.SecondaryCommands>
Buttons
Button
响应用户输入和点击事件。
<Button Margin="72,163,0,0" Content="请勿转载"></Button>
按钮点击可以使用X:Bind,而不是使用命令,这个方法可以绑定 ViewModel 的方法,方法可以添加参数,也可以不添加。
Hyperlink
超链接
        <TextBlock HorizontalAlignment="Left" Margin="72,163,0,0" TextWrapping="Wrap"  VerticalAlignment="Top">
           <Hyperlink NavigateUri="http://blog.csdn.net/lindexi_gd"> 博客发在csdn </Hyperlink>,没有授权红黑转载,没有授权推酷转载
        </TextBlock>

Repeat button
用户点击不停响应。
Collection/data controls
Flip view
幻灯片播放
现在这个类不是很好,暂时也没有发现比较好的做法,因为他无法在播放所有的页之后,回到第一页。
      <FlipView>
            <Image Source="Assets/QQ截图20160328094421.png"></Image>
            <Image Source="Assets/QQ截图20160328094435.png"></Image>
      </FlipView>

http://www.cnblogs.com/Damai-Pang/p/5201206.html
Grid view
行列布局,可以水平滚动控件。
Items control
提供UI指定数据模板
List view
在一个列表上的项目的集合,可以垂直滚动控件
我们做一个viewmodel,添加列表,这时可以用于绑定,其他关于这个控件,请看 win10 UWP ListView
    public class viewmodel : notify_property
    {
        public viewmodel()
        {

        }
    }
        public ObservableCollection<string> lindexi
        {
            set;
            get;
        } = new ObservableCollection<string>()
        {
            "林德熙",
            "csdn"
        };
        <ListView ItemsSource="{x:Bind view.lindexi}">
            <ListView.ItemTemplate>
                <DataTemplate>
                    <TextBlock Text="{x:Bind }"></TextBlock>
                </DataTemplate>
            </ListView.ItemTemplate>
        </ListView>

Date and time controls
Calendar date picker
日历日期选择器


Calendar view
日程表,让用户选择日期

Time picker
用户选择一个时间

Flyouts
Flyout
显示一条消息
        <Button Margin="200,153,0,0" Content="请勿转载">
            <Button.Flyout>
                <Flyout>
                    <StackPanel>
                        <TextBlock Text="http://blog.csdn.net/lindexi_gd"/>
                    </StackPanel>
                </Flyout>
            </Button.Flyout>
        </Button>

Menu flyout
暂时显示命令或列出选项给用户选择
            <AppBarButton Icon="OpenWith" Label="浮出">
                <AppBarButton.Flyout>
                    <MenuFlyout>
                        <MenuFlyoutItem Text="林德熙"/>
                        <MenuFlyoutItem Text="csdn"/>
                        <MenuFlyoutSeparator></MenuFlyoutSeparator>
                    </MenuFlyout>
                </AppBarButton.Flyout>
            </AppBarButton>
Popup menu
弹出自己写的菜单
Tooltip
提示
<Button Content="Button" Click="请勿转载"
        ToolTipService.ToolTip="没有授权红黑转" />
Images
Image
图片
<Image Source="Assets/QQ截图20160328094421.png"></Image>

如果需要gif,请使用 10586 以上或http://www.songsong.org/post/2015/10/11/ImageLib.html
Graphics and ink
InkCanvas
<InkCanvas></InkCanvas>
手写

保存文件可以去 edi.wang 大神的博客,或我的win10 uwp 使用油墨输入 、老周的将墨迹保存到图像
Shapes
椭圆,矩形、线、贝塞尔曲线路径
<Ellipse Fill="Black" Width="100" Margin="10,10,10,10" Height="200"></Ellipse>
<Rectangle Fill="Black" Width="10" Height="100" Margin="10,10,10,10"></Rectangle>
           <Path Stroke="Black" StrokeThickness="10">
                <Path.Data>
                    <PathGeometry>
                        <PathGeometry.Figures>
                            <PathFigure StartPoint="10,100">
                                <PathFigure.Segments>
                                    <BezierSegment Point1="100,50" Point2="150,200" Point3="200,100"></BezierSegment>
                                </PathFigure.Segments>
                            </PathFigure>
                        </PathGeometry.Figures>
                    </PathGeometry>
                </Path.Data>
            </Path>


Layout controls
Border
边框
Canvas
画板
Grid
网格布局
StackPanel
堆放布局
Scroll viewer
滚动视图
            <ScrollViewer Height="20" VerticalScrollBarVisibility="Visible">
                <StackPanel Orientation="Vertical">
                    <TextBlock Text=" 林德熙"/>
                    <TextBlock Text="脑残粉"></TextBlock>
                </StackPanel>
            </ScrollViewer>
Viewbox
可以改变内容的长宽
                <Viewbox Width="100">
                    <TextBlock Margin="10,10,10,10" Text="林德熙"></TextBlock>
                </Viewbox>
                <Viewbox Width="200">
                    <TextBlock Margin="10,10,10,10" Text="林德熙"></TextBlock>
                </Viewbox>
                <Viewbox Width="300">
                    <TextBlock Margin="10,10,10,10" Text="林德熙"></TextBlock>
                </Viewbox>

Media controls
Media element
播放视频
其实我之前用它播放音频https://github.com/lindexi/Markdown

        private async void speech(string str, MediaElement media_element)
        {
            SpeechSynthesizer synthesizer = new SpeechSynthesizer();
            SpeechSynthesisStream stream = await synthesizer.SynthesizeTextToStreamAsync(str);
            media_element.SetSource(stream, stream.ContentType);
            //http://blog.csdn.net/lindexi_gd
            media_element.Play();
        }
还有没写好,全屏出问题,可以来我博客http://blog.csdn.net/lindexi_gd之后找到解决将会写一个,可能是预览版,在真机就出错
MediaTransportControls
控制播放
Navigation
Hub
全景视图控件
            <Hub>
                <HubSection Header="林德熙">
                    <DataTemplate>
                        <Image Source="Assets/QQ截图20160328094421.png"></Image>
                    </DataTemplate>
                </HubSection>
                <HubSection Header="http://blog.csdn.net/lindexi_gd">
                    <DataTemplate>
                        <Image Source="Assets/QQ截图20160328094435.png"></Image>
                    </DataTemplate>
                </HubSection>
                <HubSection Header="sharp">
                    <DataTemplate>
                        <StackPanel Orientation="Horizontal">
                            <Ellipse Fill="Black" Width="100" Margin="10,10,10,10" Height="200"></Ellipse>
                            <Rectangle Fill="Black" Width="100" Height="100" Margin="10,10,10,10"></Rectangle>
                            <Path Stroke="Black" StrokeThickness="10">
                                <Path.Data>
                                    <PathGeometry>
                                        <PathGeometry.Figures>
                                            <PathFigure StartPoint="10,100">
                                                <PathFigure.Segments>
                                                    <BezierSegment Point1="100,50" Point2="150,200" Point3="200,100"></BezierSegment>
                                                </PathFigure.Segments>
                                            </PathFigure>
                                        </PathGeometry.Figures>
                                    </PathGeometry>
                                </Path.Data>
                            </Path>
                        </StackPanel>
                    </DataTemplate>
                </HubSection>
            </Hub>

Progress controls
Progress bar
进度条
<ProgressBar Value="10" Height="100"></ProgressBar>

<ProgressBar Value="10" IsIndeterminate="True" Height="100"></ProgressBar>

Progress ring
<ProgressRing Width="100" IsActive="True"></ProgressRing>

Text controls
Auto suggest box
<AutoSuggestBox PlaceholderText="输入林德熙" QueryIcon="Find" Margin="10,10,10,10" TextChanged="query" DisplayMemberPath="name" ></AutoSuggestBox>
需要在后台https://github.com/Microsoft/Windows-universal-samples/tree/master/Samples/XamlAutoSuggestBox

Password box
密码输入
<PasswordBox Margin="10,10,10,10" Height="10" PlaceholderText="输入中文密码" IsPasswordRevealButtonEnabled="True"></PasswordBox>

Rich edit box
<RichEditBox Name="redit" Grid.Row="3" Margin="10,10,10,10" ContextMenuOpening="OnContextMenuOpening">
            <FlyoutBase.AttachedFlyout>
                <MenuFlyout>
                    <MenuFlyoutItem Text="复制" Click="OnCopy"/>
                    <MenuFlyoutItem Text="剪切" Click="OnCut"/>
                    <MenuFlyoutItem Text="粘贴" Click="OnPaste"/>
                    <MenuFlyoutSeparator/>
                    <MenuFlyoutSubItem Text="字号">
                        <MenuFlyoutItem Text="16" Tag="16" Click="OnFontSize" />
                        <MenuFlyoutItem Text="20" Tag="20" Click="OnFontSize"/>
                        <MenuFlyoutItem Text="24" Tag="24" Click="OnFontSize" />
                        <MenuFlyoutItem Text="36" Tag="36" Click="OnFontSize"/>
                        <MenuFlyoutItem Text="48" Tag="48" Click="OnFontSize"/>
                    </MenuFlyoutSubItem>
                    <!--分割-->
                    <MenuFlyoutSeparator/>
                    <ToggleMenuFlyoutItem Text="加粗" Click="OnBold" />
                    <MenuFlyoutSeparator/>
                    <MenuFlyoutSubItem Text="下划线">
                        <MenuFlyoutItem Text="无" Tag="-1" Click="OnUnderline" />
                        <MenuFlyoutItem Text="单实线" Tag="0" Click="OnUnderline"/>
                        <MenuFlyoutItem Text="双实线" Tag="1" Click="OnUnderline"/>
                        <MenuFlyoutItem Text="虚线" Tag="2" Click="OnUnderline"/>
                    </MenuFlyoutSubItem>
                    <MenuFlyoutSeparator/>
                    <MenuFlyoutSubItem Text="颜色">
                        <MenuFlyoutItem Text="黑色" Tag="黑色" Click="OnTinct"/>
                        <MenuFlyoutItem Text="蓝色" Tag="蓝色" Click="OnTinct"/>
                        <MenuFlyoutItem Text="白色" Tag="白色" Click="OnTinct"/>
                    </MenuFlyoutSubItem>
                </MenuFlyout>
            </FlyoutBase.AttachedFlyout>
        </RichEditBox>
Text block
简单输出文本
<TextBlock HorizontalAlignment="Left" Margin="72,163,0,0" Text="博客发在csdn ,没有授权红黑转载,没有授权推酷转载" TextWrapping="Wrap" VerticalAlignment="Top" ></TextBlock>

Text box
用户输入文本
<TextBox Margin="10,10,10,10" Height="10"></TextBox>

博客:http://blog.csdn.net/lindexi_gd
现在委托csdn维权,没有授权的网站不要转载
原文https://msdn.microsoft.com/en-us/windows/uwp/controls-and-patterns/controls-by-function
本文会经常更新,请阅读原文: https://blog.lindexi.com/post/%E6%8E%A7%E4%BB%B6.html ,以避免陈旧错误知识的误导,同时有更好的阅读体验。
如果你想持续阅读我的最新博客,请点击 RSS 订阅,推荐使用RSS Stalker订阅博客,或者收藏我的博客导航
 本作品采用
知识共享署名-非商业性使用-相同方式共享 4.0 国际许可协议
进行许可。欢迎转载、使用、重新发布,但务必保留文章署名林德熙(包含链接:
https://blog.lindexi.com
),不得用于商业目的,基于本文修改后的作品务必以相同的许可发布。如有任何疑问,请
与我联系
。
本作品采用
知识共享署名-非商业性使用-相同方式共享 4.0 国际许可协议
进行许可。欢迎转载、使用、重新发布,但务必保留文章署名林德熙(包含链接:
https://blog.lindexi.com
),不得用于商业目的,基于本文修改后的作品务必以相同的许可发布。如有任何疑问,请
与我联系
。

无盈利,不卖课,做纯粹的技术博客
以下是广告时间
推荐关注 Edi.Wang 的公众号

欢迎进入 Eleven 老师组建的 .NET 社区

以上广告全是友情推广,无盈利